Archive for the ‘Recipes’ category

Soft Chicken

July 18th, 2013

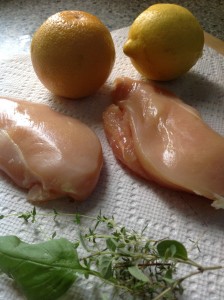
Can individuals with a swallowing disorder eat meat? Well,raw chicken breastsmost can at least eat chicken, provided that it’s very soft and will form a bolus as it’s chewed. This recipe is good for everyone else in the family as well. What’s produced is what I call “soft” chicken, meaning that although in a sense the chicken is over-cooked, it’s still delicious. It’s the marinade that softens the protein in the chicken and helps the chicken absorb the flavors.

Orange/Lemon Marinade

1/2 cup orange juice

¼ cup lemon juice

2 teaspoon Dijon mustard

1/2 teaspoon salt

1/4 teaspoon freshly ground pepper

1 tablespoon grated orange zest

1 tablespoon minced fresh or dried green herbs (thyme, parsley, oregano, etc.)

½ teaspoon minced garlic

1/4 cup olive oil

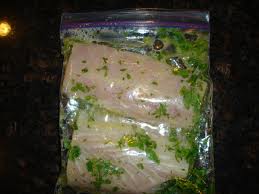
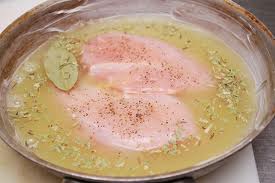
Directions: In a small glass bowl, whisk together all the ingredients. Put the chicken breasts into a sealable plastic bad and pour the marinate over them. Seal and put in the refrigerator for at least 30 minutes or maximally to two days. When ready to cook, place the chicken breasts in a baking dish large enough to hold them in a single layer, sprinkle with salt and pepper on both sides. Place the marinade in a small pot and bring to a slow boil. Boil gently for 5 minutes, then pour the marinade over the chicken breasts. Either bake in a 325 degree F oven for 30 minutes until the chicken is very soft when poked with a fork, or simmer them slowly in a pan over low flame on your stovetop

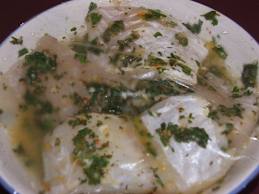
marinade for fish in plastic badchicken simmering Remove from oven and with a large fork, hold each chicken breast under a stream of warm water until all the marinade particles are removed. Serve

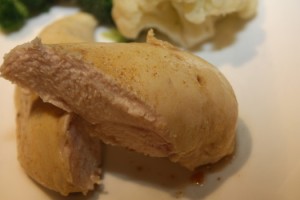
cooked chicken breast


Adding Flavor with Marinades

July 17th, 2013


marinade for fishAlmost any fish, fowl, or meat can develop inherent complexity and enriched flavor if you marinade before you cook. This concept works extremely well for us, because we can create flavor without consequence. We marinate until the fish or chicken is softened and the flavor is absorbed, then scrap or wash off the spices. We can go further and cook the fish or chicken  in a Mirepoix or Softrito, adding additional flavor, and then removing the cooked mirepoix from the fish or chicken before serving.

Making  a marinate is as simple as using  an acidic ingredient such as lemon juice, wine or yogurt, and  then flavoring that  with oil and spices.  It’s the acidic ingredient that softens the food and allows it to absorb the flavors.

Maricel Presilla in Gran Cocina Latina: the  food of  Latin American (2012) says that being Cuban she marinates any fish, fowl, or meat the minute she brings them home. For Latin cooks this is the adobo, the first layer. Presilla uses the same one for everything, meat, pork, chicken, fish, turkey, even a whole pig!

Adobo, Maricel Presilla

Crush a blend of seasonings, mostly allspice & garlic (I add fresh or dried herbs such as thyme and basil], in a mortar with a pestle and add the juice of bitter orange for moisture and tang and acidity. When I make her adobo,  I don’t have bitter oranges readily available so I use a regular Florida orange with a good helping of its grated rind and fresh or dried green herbs.  Rub this into whatever you plan to serve.  Put it into a covered nonreactive bowl, or into a plastic sealable bag,  and put into the refrigerator.marinade for fish in plastic bad

Marinating fish will add flavor, but it should be brief. More than 30 minutes of an acidic marinate and the acid will denature the protein and the fish will become mushy. So 30 minutes is enough already! Ah well, unless we talking about a dense fish such as tuna or swordfish, then you can marinate up to 8 hours. Two hours in the refrigerator for chicken is usually enough. 

You’ll marinate and then remove the fish or chicken from the liquid and scrape off any clinging pieces, even rinse briefly under a shower of water. Just to be sure particles don’t adhere. Then sauté, bake, or poach. The flavors will persist!

Here’s a website on marinating: http://startcooking.com/marinating-101-an-introduction-to-marinating-beef-chicken-and-fish.

After the marinade (I usually don’t use the marinade in the cooking process unless it’s boiled first) I cook the chicken or the fish in olive oil with a combination of onions and garlic, first simmered gently in olive oil until softened and then adding other aromatic vegetables such as diced celery and carrots, followed by liquids such as white or red wine or tomatoes  with a bouquet garni added.  This is a mixture I use for everything, soups, stews, etc. We’re going to cook in the mixture and then strain it so that we don’t leave any bits behind to fall into the airway or hide away in the crevices of the throat.

Here’s what Wikipedia has to say about my combination which is the French mirepoix:  “Similar combinations of vegetables are known as sofrito in Spanish, refogado (braised onions, garlic and tomato) in Portuguese, soffritto (onions, garlic and celery) in Italian, Suppengrün (soup greens) in German and soepgroente in the Netherlands (usually purchased in bundles and consisting of a leek, a carrot and piece of celeriac), holy trinity (onions, celery and bell peppers) in Cajun and Creole cooking, and włoszczyzna in Polish, and typically consists of carrots, parsnips, parsley root, celery root, leeks, cabbage leaves, and sometimes celery and flat-leaf parsley.”

My go-to combination  is the following:

Mirepoix or Softrito

1-2 tablespoons olive oil

1 cup diced onion

1 cup diced celery

½ cup diced carrot

2 cloves of garlic

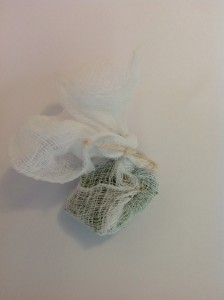
1 bouquet garni (1/2 bay leaf, 2 sprigs of parsley, ½ teaspoon dried thyme tied in a piece of washed cheese cloth)

Heat the olive oil in a medium sized frying pan. Add 1 tablespoon olive oil and the onions. Simmer until the onions are translucent (5 minutes); add the celery, carrot, garlic and bouquet garni. Continue simmering for 10 more minutes/

As I said, I use this combination for almost everything I cook: soups, stews, chicken, fish, marinades, so I often double or triple the recipe and then freeze the cooked mirepoix by the tablespoon in an ice cube tray.  When I need them, I pop one or two out of the ice cube tray and simmer it slowly in a tablespoon of olive oil and voila! I have a quick start to a meal.

Firm White Fish*

2 servings

Defrost two fish fillets according to package directions (in a bowl of cold water)

Marinate them 30 minutes in the marinade described above

Remove from marinate and rinse gently under cold water; pat dry

Add 1 tablespoon of olive oil to medium size frying pan

Add Mirepoix above, simmering if frozen until melted and heated through

Add fish. Simmer 3 to 5 minutes on one side (simmer means that you can barely see little bubbles plopping up.)

Turn fish; simmer again on other side 2 to 4 minutes

Remove fish; scrap any clinging herbs from fish

If herbs cling, rinse briefly with hot water

Serve.

*I used frozen Hake from Costco
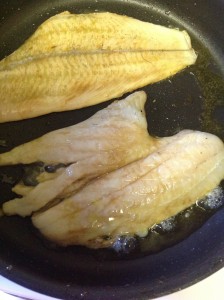
hake in frying pan


Polenta

July 12th, 2013

polenta-2 mascarpone_polenta-1 creamy-polenta

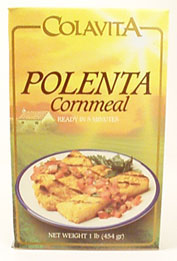
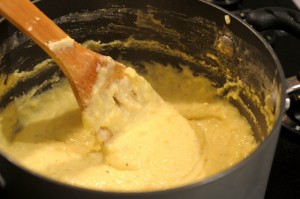
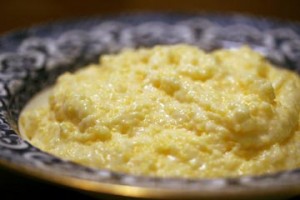
Polenta is the Italian name for stone-ground corn, but it’s also known as cornmeal mush or grits and is a basic grain in many cultures.  It’s milled corn kernels that can be cooked into porridge or baked, or fried. An excellent, delicious recipe for people with swallowing disorders or anyone else who loves to eat. There’s really not any modification needed for this recipe: if the polenta seems too thick, add some more butter or stir in a dollop of cream.

Here are the basic ingredients for Polenta

6 cups water

2 teaspoons salt

1 3/4 cups yellow cornmeal

3 tablespoons unsalted butter

Directions

Bring 6 cups of water to a boil in a heavy large saucepan. Add 2 teaspoons of salt. Gradually whisk in the cornmeal.  Marcella Hazen, the famous Italian cookbook writer says the following: “turn the heat down to medium low so that the water is just simmering, and add the cornmeal in a very thin stream, stirring with a stout, long wooden spoon The stream of cornmeal must be so thin that you can see the individual grains, A good way to do it is to let a fistful of cornmeal run through nearly closed fingers. Never stop stirring, and keep the water at a slow, steady simmer” [Marcella Hazen, The Classic Italian Cookbook].  Cook very slowly until the mixture thickens and the cornmeal is tender, stirring often, about 30 to 45 minutes. The polenta is done when it tears away from the sides of the pot as you stir.Then turn off the heat. Add the butter, and stir until melted.

Read more at: http://www.foodnetwork.com/recipes/giada-de-laurentiis/basic-polenta-recipe/index.html?oc=linkback

You can make polenta with water only as in the recipe above, but it’s a little richer and creamier if you add 1/2 cup of milk to the recipe so there’s 6 ½ cups of liquid. I’d add more butter as well, vigorously stirred in along with ½ cup freshly grated Parmesan cheese

For polenta you’re serving right away, you want a consistency about as thick or sour cream.


IMG_0260

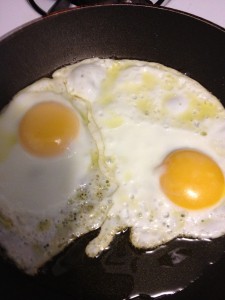
Now comes the fun part. What do you put on top of the Polenta [not that it’s not perfectly delicious all by itself]?  You could add poached or fried eggs (be sure you don’t have crispy edges; mix the eggs into the polenta so there’s no “runniness”, that is, nothing to drop into the airway ).


Or, add a thick tomato sauce.


Thick Tomato Sauce

3 tablespoons olive oil

½ cup finely diced onions

½ cup finely diced celery

½ cup finely diced carrots

2 cloves garlic, finely diced

1 large can (28 oz) Sclafani crushed tomatoes (preferred because they’re delicious & already thick)

2 tablespoons thick tomato paste

1 bouquet garni (1 teaspoon each of the following dried herbs: basil, oregano, thyme tied into a piece of washed cheese cloth; or use the same combination of fresh herbs, increasing the amount to 2 sprigs each)bouquet garni in cheese cloth

1. Heat the olive oil and add the onions and cook over low heat for 10 minutes until the onions are translucent.

2. Add the celery, onions, carrots and garlic and bouquet garni and continue to cook another 5-8 minutes until the celery & carrots are soft.

3. Add the tomatoesSclafani crushed tomatoes and bring to a simmer (bubbles just starting to pop up). Lower the heat and set the pot’s lid at an angle, and cook until the sauce is thick, about 30 minutes.

4. Add the tomato paste and cook an additional 10 minutes.

5. Remove the bouquet garni and then strain the sauce to remove any remaining bits of vegetables.

6. Put a helping of the polenta in a bowl and cover with a ½ cup of the tomato sauce.


You could also use the polenta to make a lasagna-like dish, substituting sliced polenta for lasagna noodles, layering with cheeses such as Pecorino Romano and Fontina or gruyere.

Joy the Baker, on her food blog (January 14, 2013), has a recipe for baked polenta. It’s pretty much the same recipe as above, but here you pour the ingredients except the butter into an 8 x 8 inch baking pan. Stir to combine (the polenta will  sink to the bottom of the pan, she says,  & the water will be cloudy) and bake for 45 minutes in a 350 degrees F oven. Remove from heat and add butter, bake again for 15 more minutes. The top may be crusty and you might want to remove it, before serving it, as she did, with the thickened tomato sauce.


Musings on Starch, Potatoes & Potato Recipes

July 11th, 2013


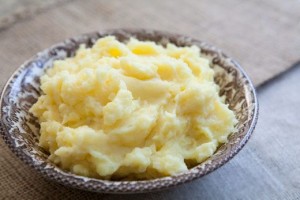
mashed potatoes

Potatoes contain a lot of starch and for that reason they are extremely useful for thickening soups and other dishes. But it is important to pay attention to what kind of potato you choose for recipes because each type of potato has a different ratio of starch to moisture and each will behave differently  when exposed to water and heat.

According to Cook’s Illustrated: the Science of Good Cooking, 2012, the starch content in potatoes can range from 16% to 22%. Less starch, and you get a firm, waxy potato, like the Red Bliss or French Fingerling. More starch such as in a Russet produces a crumbly, mealy texture. In the middle is Yukon Gold. Read more: http://forward.com/articles/14652/the-perfect-potato-/#ixzz2YkAt9zZJ

Russet potatoes are the best choice for mashing and for thickening. Add a grated Russet  potato to any soup and you have added a natural thickener. Add a lot of potatoes and you can end up with an even thicker soap as in Vichyssoise (from earlier posts) or my father’s old fashioned potato soup. At the other end of the starch spectrum are Red Bliss. I boiled those and then removed their skins in a recent blog post. Fork-mashed with a bit of butter they were an easy and safe addition to a good meal.

Russets are better able to absorb liquid and they produce a fluffier potato when mashed. And mashed potatoes are true comfort foods. Most food cultures in countries where potatoes are grown have treasured comfort food recipes which can be adapted for individuals with swallowing disorders.

Here are some tips about cooking potatoes

  • Start potatoes in cold water: it makes for speedier cooking time and better potato texture.
  • Potatoes are best boiled in their skins because when they are are boiled whole and unpeeled, they absorb less water and can then absorb more cream and butter. Their potato flavor is much stronger, too, not washed out.
  • Use a ricer or a food mill, both of which yield a much smoother mash than a potato masher.
  • Stirring or using the food processor will manipulate texture for dishes that are meant to have a more sticky, tacky texture.
  • Potatoes done in the food processor will be thick and gluey.

In conclusion: The method of handling your potatoes will affect the texture of your final dish. Pay careful attention to how much–or how little–you process them.

Classic Mashed Potatoes

Serves 4

2 pounds russet potatoes, cooked with the skins on

8 tablespoons unsalted butter, melted

1 cup half-and-half, warmed

salt and pepper

  1. Place potatoes in large saucepan and add cold water to cover by 1 inch. Bring to boil over high heat, reduce heat to medium low, and simmer until potatoes are just tender (paring knife can be slipped in and out of potatoes with little resistance) 20 to 30 minutes. Drain
  2. Set ricer or food mill over now empty saucepan. Using potholder (to hold potatoes) and paring knife, peel skins from potatoes. Working in batches, cut peeled potatoes into large chunks and press or mill into saucepan.
  3. Stir in butter until incorporated. Gently whisk in half-and-half, add 1 1/2 teaspoons salt, and season with pepper to taste. Serve

Add a cup of grated mild cheddar cheese and you have another taste

You could also cook potatoes in stock as in the following recipe

Potatoes in Chicken Stock with Mint and Butter

2 pounds russet potatoes

1 1/2 quarts chicken stock (I use Better than Bouillon)

2 fresh or dried bay leaves

1 bunch of fresh mint leaves

1 tablespoon coarse sea salt

2 tablespoons unsalted butter

  1. Scrub the potatoes, but do not peel. Halve them lengthwise. Place them in a two quart pan or  casserole. Cover with the stock, the bay leaves, the bunch of mint, and the salt. Bring to a simmer over moderate heat and cook, covered, until cooked through when pierced with the tip of a knife, about 20 minutes. Drain and set aside. Discard the bay leaves and mint.
  2. When the potatoes have cooled, either peel them or push them through a food mill which will take off the skins.
  3. Add butter and beat vigorously with a wooden spoon.
  4. Serve immediately.

My mother’s scalloped potatoes

2 1/2 pounds Russet potatoes

2 tablespoons of lightly salted butter plus 1/2 stick

1 peeled clove of garlic

4 tablespoons flour

1/4 cup finely minced onions

1/2 stick of lightly salted cold butter

salt and pepper

1 cup whole milk, heated to warm, but not boiled

  1. Preheat oven to 350 degrees
  2. Generously butter a 2 1/2 quart casserole with 2 tablespoons of butter
  3. Rub the buttered casserole with the clove of garlic, then discard the garlic
  4. Peel the potatoes and slice into 1/16 inch slices (use a knife or a slicer or mandoline or the slicing disk on your food processor)
  5. Cut the butter into 1 tablespoon sections, using the paper wrapper as a guide, then cut each piece in four.
  6. Begin layering the potatoes in the casserole, sprinkling each layer with the minced onions, a teaspoon or so of the flour, salt and pepper, and dot with the small pieces of butter. Try for a least 3 layers.
  7. Pour the warmed milk over the layers of potatoes. Make sure the milk comes about 3/4 of the way up the side of the casserole.
  8. Put into the heated oven and bake 35 to 45 minutes
  9. Serve hot

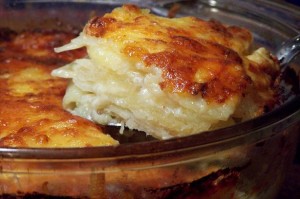
You could add a cup of shredded cheddar cheese between the layers; don’t use Mozzarella as it’s likely to be stringy once heated and you want to avoid stringiness. In the picture on the left below, cheese has been sprinkled on the top of the casserole. Don’t do that as the browned topping may not form the cohesive bolus you want. Of course, you could always remove the top after baking so that you still get the flavor of having the cheese and the cheese will be in the body of the dish.

scalloped potatoes with cheese scalloped potatoes

Another Green Smoothie

July 9th, 2013

IMG_0375

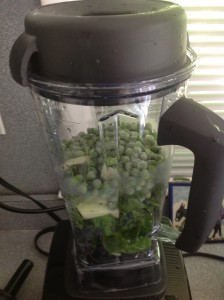
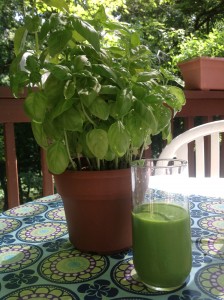
Today is again the day I pick up more vegetables from the CSA so I’m motivated to use up the greens I have left in my refrigerator. It’s a hot, hot day already and it’s just 11:00 a.m. and so who wants to cook? Plus, I have a new Vitamix Blender. The obvious  plan is to make a green smoothie. This recipe turned out to be very tasty, I think, and surely very good for you.  My friend Pat always asks, “Is it good for you?” I think she’s taken a pledge never to eat anything that’s not good for her and by and large she succeeds. So this green smoothie is, indeed, “good for you.” The picture above is from my cottage’s deck where I have two boxes full of herbs and about half dozen individual pots filled with herbs: two types of basil, sage, tarragon, cilantro, more thyme, rosemary, oregano, and mint. Plus a huge tomato plant and lots of flowers. I don’t consider myself a gardner, but I do love being able to walk out and cut fresh herbs for seasoning and use a flower pot for a center piece. The next post is going to be about using herbs for seasoning foods other than smoothies where we might worry about left over particles that might prove problematic for people with swallowing disorders. But in the recipe below, the herbs (garlic scapes and basil) were completely blended. That’s the plus of a powerful blender.

Pea, Celery & Swiss Chard Smoothie

3 leaves of Swiss Chard

2 stalks of celery

½ cup frozen green peas

1 sliver of garlic or 1 strand of garlic scapes

½ cup of Greek yogurt

2 leaves of fresh basil (if available)

Put all ingredients into a blender. Blend at low speed until vegetables are nearly processed, then blend at high speed until completely smooth.


IMG_0378ie IMG_0380

Beet Greens, Fish, and Soft Boiled Potatoes

July 1st, 2013

IMG_0265 IMG_0266

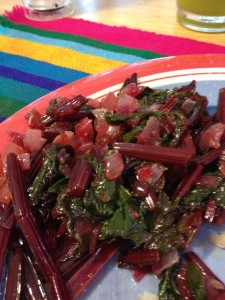
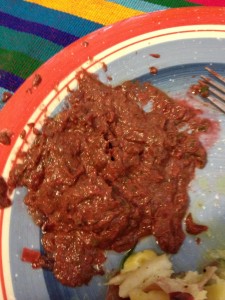
Beet Greens Before & After

  Among the veggies left in my frig to try to eat by tomorrow when the CSA veggies arrive were beet greens! I’d already roasted the beets themselves and have them ready for the cold Borscht soup to follow. But the greens? So attractively bright green! Surely that means that they’re super-good for us? Oh, right, anything disagreeable sounding is bound to be good for us!  But, yes, indeed, they are good for us. Beet greens are loaded with nutrients, super chucked with all good things. Check this out for yourself and see what you’ll gain if you try a few:  http://nutritiondata.self.com/facts/vegetables-and-vegetable-products/2352/2 So I agree that beet greens are not a vegetable I’d approach with enthusiasm! Ah, hah! Surprise!  They turned out to be so delicious and easy to prepare. It reminds me that we really need to think of how we can eat just about  everything attached to any vegetable: the fruit, the stem, the leaves. Not just for thrift, but most important, for their nutritive value and basic yumminess! Now it’s not  always equally true across  all vegetables that the leaves and stems are as  yummy as the main fruit , but as a rule , the stems and leaves are so much more than we think!  These were simply faulouso!

Here’s What I did:

Sautéed Beet greens

1 bunch of beet greens, separated from the beets

2 Tablespoons olive oil 1 cup diced red onions

1 clove of garlic 1 bouquet garni (2 stems of parsley, 1 stem of thyme, 1/2 bay leaf tied in a washed piece of cheese cloth)

1/2 tbsp red wine vinegar

Directions: Wash a bunch of beet greens, through several waters (they can be gritty) Separate the stems from the leaves and chop roughly Roughly chop the beet greens Add 2 Tablespoons of olive oil to a medium size frying pan Simmer 1 cup of diced red onions in the olive oil for 10 minutes under low heat Add a clove of garlic finely diced Add the beet stems that have been chopped into 1 inch peies Add the herb bouquet Raise the heat while you stir the mixture together  and cook for 10 minutes, Reduce heat and simmer for an additional  10 minutes Add the greens; simmer for 20 more minutes Remove from the heat When the mixture cools add ½ Tablespoon red wine vinegar Simmer 5 more minutes Cool mixture to room temperature Pour into a blender and blend thoroughly Add the vinegar Blend again for 1 to 3 minutes Reheat gently when ready to serve Serve with soft pan-fried  fish IMG_0242and soft boiled potatoes

Pan-Fried Fish

1/2 tablespoon olive oil

a dab of butter

1 bouquet garni of thyme, basil & oregano (fresh or dried), pepper (tied in cheesecloth into a small bundle)

1 fillet of flounder or other white fish without bones!

Directions : 1. Heat olive oil until it’s foaming; add butter

2. Add fish to pan, place bouquet garni on top of fish

3. Saute for 3 minutes

4. Flip fish over and put bouquet  garni on top of the fish  again

5. Saute for 3 minutes on this side.

6. Remove bouquet  garni

7. Serve fish on plate.

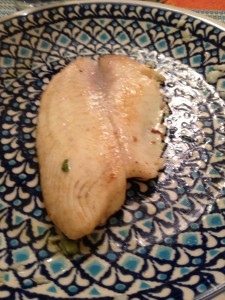
How simple is that! And delicious. I seem to have a tiny piece of some herb on this photo, but it should, of course, be removed before serving to any one with a swallowing disorder. Bones are a worry, but I’ve found that fish fillets hardly ever have any bones when they’re packaged and sold.  And we all  know that we should be eating fish more often. We do know this, right? Make sure you don’t overcook so the fish remains soft and moist.

As for the soft boiled potatoes: These were not the starchy potatoes, but by over-cooking them for a minute, you can make them soft and easily mashed with a fork with no hard edges. Beat a smidgen of butter into them and you have another delicious side.

Red Potatoes

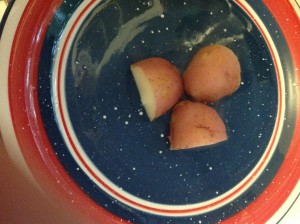
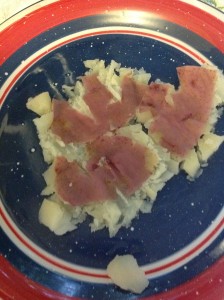
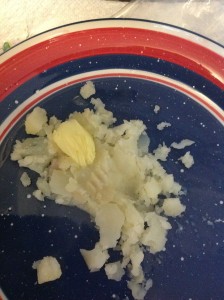
Half three or four small red potatoes. Cover with water in a small pan (ceramic if you use a microwave), simmer for 4-5 minutes if microwaving and 8-9 minutes if boing on the stove. Remove from heat. Cool enough to handle. Turn each potato over, cut side down. red potatoes cooked but unpeeled red potatoes mashed with skins Mash red potatoes, no skins

Remove skins by mashing them with a fork and then lifting off each potatoe. Mash potatoes again, mixing in a small dab of butter.  Serve . Remember: skins are among the worse foods for people with swallowing disorders, so we need be sure we’ve removed any trace.


Potato soup (Vichyssoise)

July 1st, 2013

Vichysoisse 2

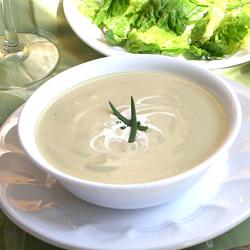
It’s been hot and humid and I have a lot of vegetables in my frig to use up before I pick up the delivery of my next batch of vegetables from the CSA (Community Sustained Agriculature). I intended to use up more than I actually did, so l’m going to have to make more of these cold vegetable soups. Well, I say “cold,” but they can be served hot or at room temperature. The classic vichyssoise recipe  is the one in Julia Child’s first cook book, Mastering the Art of French Cooking. It uses only a few ingredients: potatoes, leeks, cream and butter and the combination produces an absolutely delicious soup!. You can check it out at this website: http://homecooking.about.com/od/soups/r/blss114.htm. I had a lot of potatoes, onions, but no leeks. So  I improvised. Here’s what I made:

Potato Soup

2 tablespoons olive oil

1 cup diced  onions (or leeks if you have them, but they are a lot more work than onions since they needs to be thoroughly washed repeatedly)

1 cup diced celery

4 large russet potatoes , diced

2 tablespoons fresh herbs (oregano, thyme, basil, parsley), tied into a bundle of cheesecloth

1 large clove of garlic minced

4 cups chicken broth

1/2 cup cream (half & half; creme fraiche, or real cream)

salt to taste

HBrowning onions &eat olive oil in a large pot. Add onions and celery and cook slowly for about 10 minutes. Add the diced potatoes, herb bundle, garlic and stir to combine.Cook for 5 minutes more, then add the chicken broth. Cook over low heat 30 minutes more or until potatoes are tender. Remove the herb bundle. Let mixture stand until cool enough to handle. When cool, puree in a blender, two or three cups at a time. . When pureed thoroughly, pour into a large bowl. Add the 1/2cup of half and half and salt and stair until incorporated. Let cool to room temperature or put in the refrigerator to chill. The soup will thicken as it sits.

Note: I used Russet potatoes because these potatoes have the most starch and can by themselves be used as a thickeners. So this soup is quite  thick. If you need it somewhat thinner then don’t add the potato starch.


Smoothies

June 27th, 2013

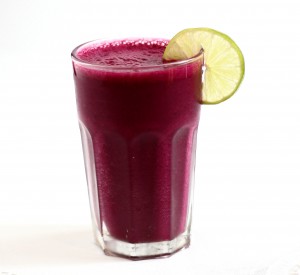
beet-smoothie1

 Who doesn’t love a smoothie?  It’s one of the best foods for people who need texture modification. They’re thick and they’re cold. Thick makes them safer to swallow and cold things make the swallow faster and more vigorous.

Smoothies are extremely versatile. There are dozens of recipe books , websites, and even smoothie juice bar/restaurants devoted to smoothies. Check out this website for example: http://allrecipes.com/recipes/drinks/smoothies/ or this one www.ehow.com/how_2217514_makesmoothies.html

There are an infinite number of combinations of vegetables and fruits, so you can be creative.  But whatever ingredients you’re using, you need to be sure that you thoroughly processed them (in a blender or food process)er, and that there are no remaining skins or seeds or other pieces left to float down the airway when swallowed. If in doubt, you can reprocess and then put the smoothie through a strainer.  As our goal is to have thick smoothies, follow the rule that the greater the number of frozen products you use, the thicker the smoothie will be. If your fruit or vegetable has a lot of fiber it will be thicker than those with less fiber. Water content matters, also, watermelon being one of the more “watery” fruits and hence will produce a more liquid smoothie. Nutrition content can be boosted by adding protein powder, tofu, milk or soy, or other nutritional supplements.

Here’s a basic formula for 2 tall servings (at least) of a fruit smoothie:

½ cup frozen fruit or vegetables

½ cup of fresh fruit or vegetable

1 scoop of protein powder

½ cup yogurt

¼ cup juice (optional)

Blend all together  for 4 to 5 minutes. Check for thickness. If not thick enough, process more.

My combination today was the following

½ mixed frozen mixed berries (from Costco)

½ fresh mango slices

1/2 cup plain Greek yogurt

1 scoop Vanilla Whey protein


Blended together, they resulted in a very thick delicious smoothie.IMG_0231


The formula is pretty much the same for vegetable smoothies, although I decided to try and use what I had in my frig which included kale and spinach. It ended up being quite tasty but exactly what we do NOT want in a smoothie. It was full of little particles even though I blended it repeatedly. I could feel little pieces clinging to my teeth. You can get into trouble with small particles falling into the airway under 3 different conditions: on 1) while you’re processing the food (bolus) through your mouth and you lose control of parts of it, usually because of tongue weakness;  2) if there is food left behind in your mouth (as in the case of this smoothie just described) or in the crevices within your throat or 3), rather rarely, as the swallow itself takes place because the airway stays open as you swallow. We want to avoid all three situations! So…I tried another mixture with success:


smoothest green smoothie


Blended Green Lemonade
serves 1-2

Ingredients:

3/4 cup water
1-2 kale leaves, stems removed
1/2 romaine heart
1/2 cucumber, chopped
1/4 ripe avocado
1/2 apple, cored
1 frozen banana
juice of 1 lemon
handful of ice

Directions:

Combine all of the ingredients in a high-speed blender, and blend until completely smooth. (You may need to use a tamper to help the ingredients reach the blades.)

Soft Scrambled Eggs

June 27th, 2013

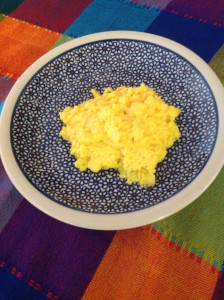
IMG_0352Soft Scrambled Eggs

What packs more nutrition in a small space than an egg?  A large egg has 102 calories, minimal fat, nearly 7 grams of protein, and an array of healthy vitamins.  They’re also  yummy and good for you! What could be better? Perfect for breakfast, lunch, or dinner.

Eggs can be poached, scrambled, soft boiled,  baked, or made into a soft French omelet. Most ways of cooking eggs will make great food for swallowing.  Today, though, the focus is on the scrambled egg.

As is so often true in cooking, how to scrambled eggs engenders lots of strong opinions.  Today, we’re going to modify Julia Child’s approach. She whisked her eggs vigorously until they had a full head of froth but other cooks declare that the eggs not be whipped, but barely mixed.   Most agree with Julia , however, when she wrote in Julia’s Kitchen Wisdom (2000), that “Scrambled eggs should be soft, broken curds,” and the more tender and delicious they will be.”  You can see Julia’s technique on YouTube:  www.youtube.com/watch?v=1JUJ3IP8zA8.

In my opinion, it’s the ingredients and the slow stirring (I prefer using a rubber spatula) that will transform your eggs into soft curds of ambrosia.

Soft Scrambled Eggs

2 T.  salted butter

4 eggs, as fresh as possible

1
 tablespoon cream, milk, or crème fraiche, or water (not as yummy)

salt to taste

IMG_0347


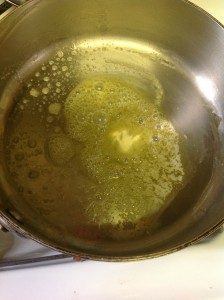
Melt 1 tablespoon of  butter in a 10-inch sauté pan over medium heat.


IMG_0340


Meanwhile, break the eggs into a fairly large mixing bowl and whisk them until the whites and yolks are well blended and frothy bubbles begin to form on the surface of the eggs.


Add the milk or cream, and continue to vigorously  whip until frothy.

IMG_0341


IMG_0349

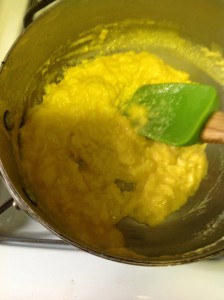
When the butter foam subsides, pour the eggs into the pan, lower the heat to medium-low and begin to stir—making sure to stir all parts of the pan to keep the eggs from sticking. Stir constantly while scraping bottom and sides of pan, until eggs are just thickened, creamy, and small curds begin to form, 3–4 minutes total. (If mixture begins to stick to pan while cooking, remove from heat; whisk gently for 30 seconds, then continue cooking over heat.)


Remove from heat.


  • Add 1/2 Tbsp. butter; whisk until melted. Season with salt; plate and serve.


IMG_0352


Skip to toolbar